
The smell of butter and breadcrumbs hitting a hot pan takes me straight back to my grandmother’s kitchen. She never measured anything, just worked by feel, and somehow her breaded chicken cutlets came out golden and shattering every single time. I have spent years trying to capture that same crackle without deep frying, and I finally cracked it.
Last month I made these for my neighbor who just had surgery. She texted me three days later asking for the recipe because her husband kept asking when I was bringing more. That is the thing about a really good cutlet. It feels like care. It feels like someone bothered.
If you are looking for more cozy chicken dishes, I have been making these chicken pot pie cups on repeat lately. They have that same comfort factor.
The Ingredients That Make These Cutlets Actually Crispy
Panko breadcrumbs are non-negotiable here. Regular breadcrumbs go dense and sad; panko stays airy and shatters when you bite. I also use grated parmesan in the coating, not just for flavor but because it browns faster and gives you that deep golden color without burning. A little garlic powder in the flour layer adds savory depth that makes people ask what your secret is. I learned this combination after testing breaded chicken cutlets six different ways last winter. If you want another hands-off chicken dinner, these chicken fajita foil packets have saved me on busy weeknights.
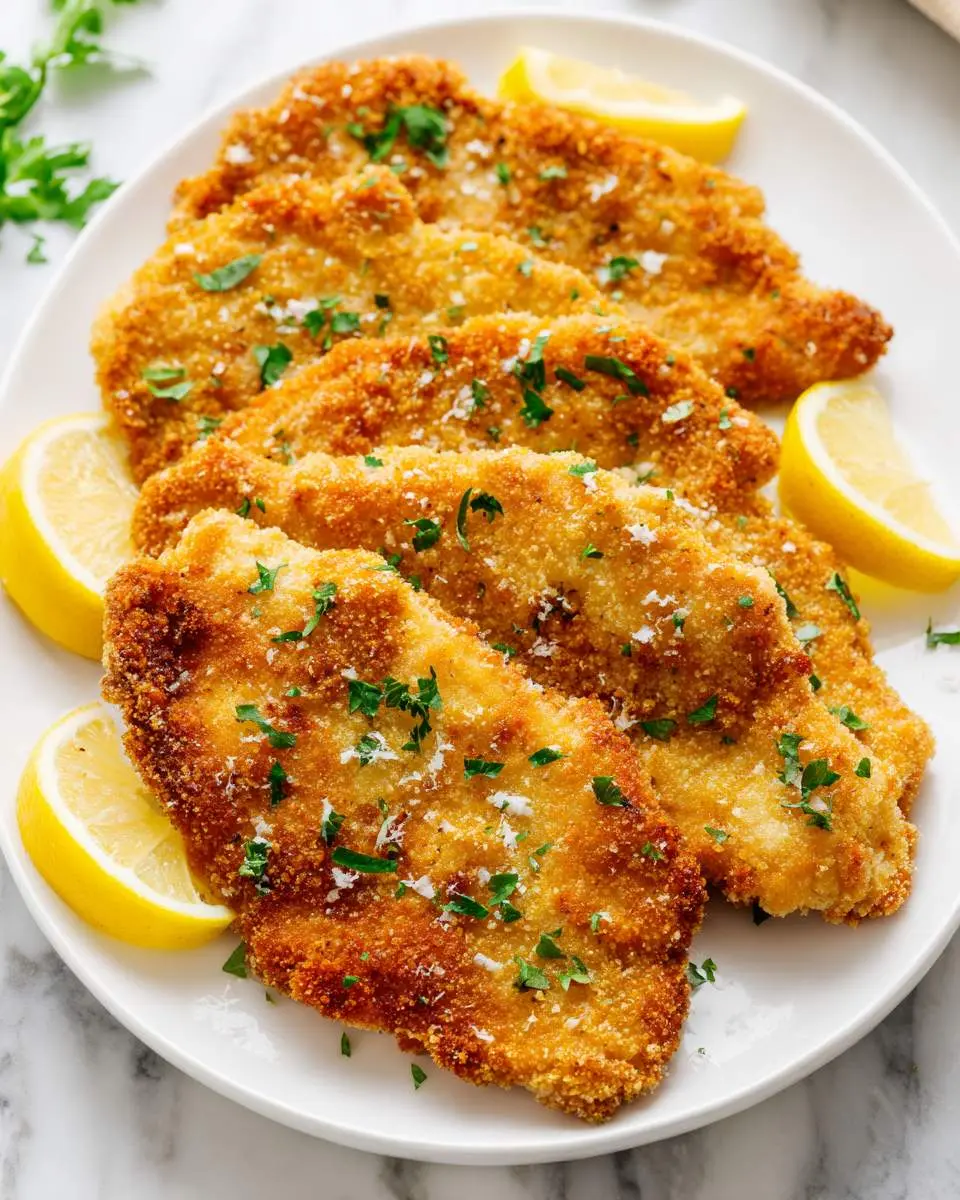
How to Make Breaded Chicken Cutlets
I set up my station with three shallow dishes. Flour first, then beaten eggs thinned with a splash of water, then the panko mixed with parmesan and seasonings. The chicken gets pounded thin between plastic wrap, which is oddly satisfying, like stress relief you can eat later. Each cutlet gets dredged, dipped, and pressed into crumbs. I let them rest on a wire rack for ten minutes, which sounds fussy but keeps the coating from sliding off in the pan.
The cooking happens fast. I use a mix of oil and butter in a heavy skillet, medium-high heat, and I do not crowd the pan. Three minutes per side, maybe four if the cutlet is thick. The sound is the guide here. A gentle sizzle means the coating is setting. If it is silent, the heat is too low and you will have greasy chicken. If it is violent, the outside burns before the center cooks. That first flip reveals the color you are chasing. Deep gold, almost bronze, with craggy edges where the panko toasted extra dark. I drain them on a wire rack, not paper towels, so the bottom stays crisp. For another crispy chicken technique, I borrowed some ideas from this chicken katsu method I have been refining.
What I Learned After Burning the First Batch
My Secret Trick: I now toast the panko in a dry skillet for three minutes before breading. It jumpstarts the browning so the chicken stays juicy while the outside gets deeply golden.
Do not skip the resting period after breading. The coating needs time to adhere, or it will slough off in the pan and you will have naked chicken and a skillet full of crumbs. I learned this the hard way when I was rushing dinner for hungry kids.
Use a meat mallet or rolling pin, but do not obliterate the chicken. Quarter-inch thickness is the sweet spot. Too thin and it dries out. Too thick and the coating burns before the center hits 165 degrees.
If your cutlets are uneven, the thin parts burn while the thick parts stay raw. I butterfly them first, then pound gently from the center outward. It takes an extra minute and saves you from disappointment.

How to Store Breaded Chicken Cutlets
- Refrigerate cooled cutlets in an airtight container for up to 3 days. Place parchment between layers to prevent the coating from getting soggy.
- Freeze individually on a baking sheet first, then transfer to a freezer bag for up to 2 months. This keeps them from freezing into a solid block.
- Reheat in a 400 degree oven on a wire rack for 12-15 minutes. The microwave ruins the texture completely. Trust me, I tried.
Why This Recipe Works for Real Life
These cutlets reheat beautifully, which matters more than I expected when I started meal prepping. The panko coating stays crisp because it is so airy to begin with, and the lean chicken breast gives you solid protein without heaviness. I have served them over salad, tucked into sandwiches, and eaten them cold straight from the fridge. Breaded chicken cutlets are genuinely versatile in a way that feels practical, not just theoretical. You are not locked into one meal type.

FAQs
Can I bake these instead of pan-frying?
Yes, but the texture changes. Bake at 425 degrees on a wire rack set over a baking sheet for 18-22 minutes, flipping halfway. You lose some of the shattering crunch but gain ease and less cleanup. I do this when I am cooking for a crowd and do not want to stand at the stove.
Why does my coating fall off when I flip the chicken?
The breading did not have time to set, or your pan was not hot enough. Let the cutlets rest after breading, and make sure your oil shimmers before adding chicken. Do not move them for the first two minutes. The crust needs to fuse to the meat.
Can I use chicken thighs instead of breast?
Absolutely, but pound them to even thickness first. Thighs stay juicier but take longer to cook through. I add two minutes per side and check the internal temperature. The flavor is richer, which some people prefer.
What oil is best for frying breaded chicken cutlets?
I use a mix of neutral oil and butter. The oil handles the high heat; the butter adds flavor and helps browning. Pure butter burns too fast. Pure oil works fine but lacks that subtle richness.

Breaded Chicken Cutlets
Ingredients
Equipment
Method
Notes
Conclusion
I still think about my grandmother’s cutlets when I make these. Hers were probably better, honestly, but mine come close enough that my family asks for them weekly. That is the goal, right? Not perfection, but something reliable and good. If you want another crispy chicken option, these crispy oven chicken tenders have become a staple in our house too.
Follow us on Social Media : Pinterest