
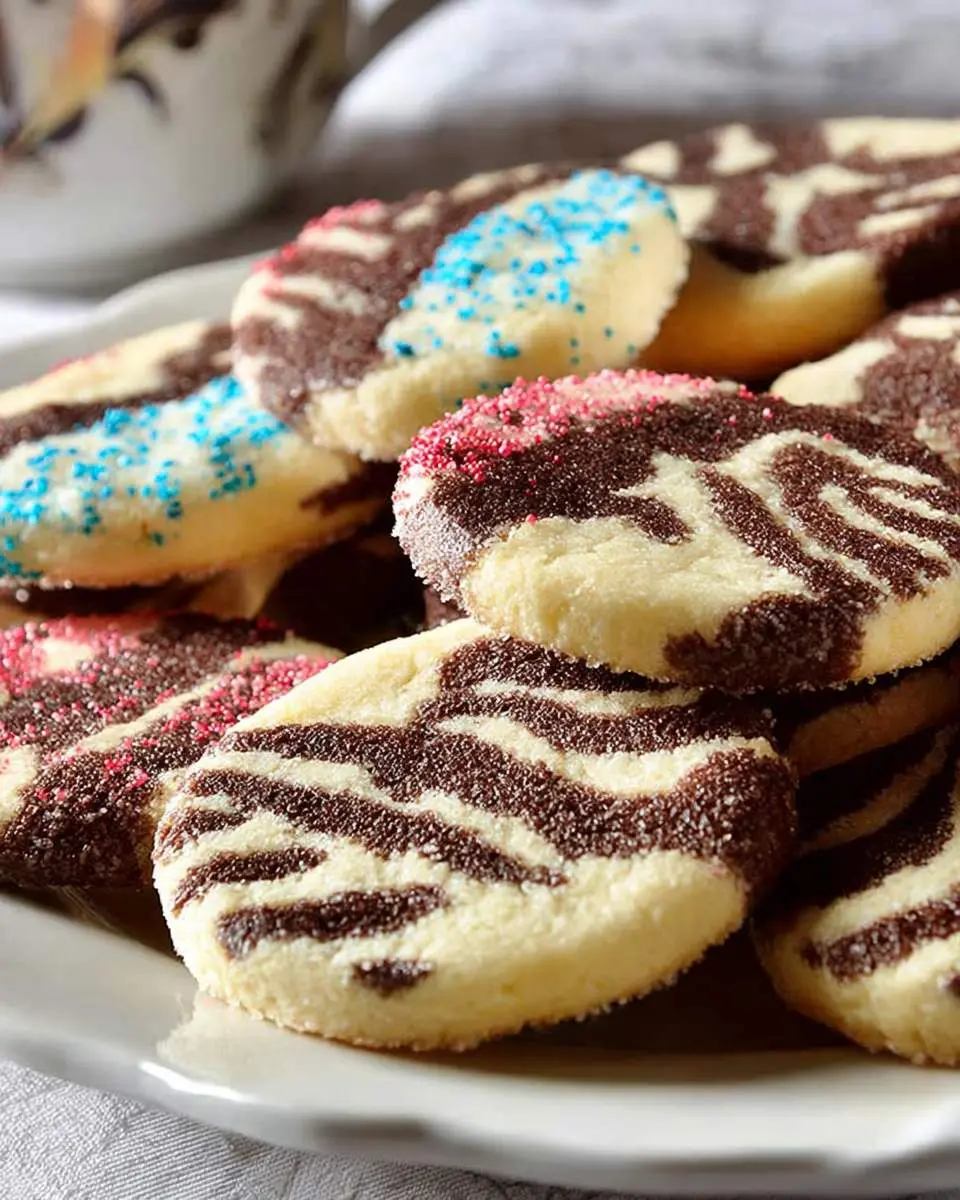
The scent of warm vanilla and melting chocolate always makes my kitchen feel like the happiest place on earth. There’s something truly magical about pulling a tray of freshly baked treats from the oven, especially when they look as captivating as these beautiful zebra cookies. I remember first seeing a picture of them and just knowing I had to try to recreate that stunning swirl.
My kids actually thought I’d bought them from a fancy bakery, they were so impressed! It’s one of those recipes that looks incredibly intricate but is surprisingly fun to put together, almost like a delicious art project.
If you’re looking for a delightful baking adventure that yields cookies as delicious as they are gorgeous, then you’re in for a treat. These are definitely a new favorite in our home, much like my delightful blueberry heaven cookies.
What You Need to Make This Recipe
Crafting these stunning zebra cookies starts with a few simple ingredients, but the magic truly happens with the quality of your cocoa powder and a really good vanilla extract. The deep, rich cocoa is what gives those dramatic dark stripes their beautiful color and intense chocolate flavor – don’t skimp on it, trust me! And a pure vanilla extract elevates the overall taste, balancing the chocolate perfectly and adding that comforting cookie warmth. Building this kind of flavor foundation reminds me of how much I love experimenting with different flours in my geode spiral cookies.

How to Make Zebra cookies
The process of making these zebra cookies is such a joy, watching the distinct doughs come together. You’ll start by making a classic butter cookie base, then divide it and infuse half with rich cocoa, turning your kitchen into a sweet-smelling haven. The real artistry comes when you roll out those contrasting doughs and layer them, pressing them gently as if you’re tucking them into bed. Then, as you slice through the chilled log, you’ll hear that satisfying soft thunk and reveal the mesmerizing stripes, like a little edible masterpiece waiting to bake. It’s a bit like the careful layering I do for my maraschino cherry chocolate chip cookies.
Pro Tips
Getting those picture-perfect zebra cookies is all about a few key techniques.
Chilling your dough thoroughly before shaping and slicing is absolutely crucial; this keeps the butter from melting too quickly in the oven, preserving those sharp, beautiful stripes and preventing your cookies from spreading into flat, amorphous blobs. Also, don’t overwork the dough when you’re mixing, especially after adding the flour, as this can lead to tough cookies rather than the tender, melt-in-your-mouth texture we’re aiming for.
My Secret Trick: When forming your log, gently twist the layered doughs just once or twice before chilling. This slight twist enhances the “zebra” effect, creating more natural-looking swirls rather than perfectly straight lines.
How to Store Zebra cookies
- Store baked zebra cookies in an airtight container at room temperature for up to 5 days to keep them fresh and chewy.
- For longer storage, freeze cooled baked cookies in a single layer on a baking sheet, then transfer to a freezer-safe bag or container for up to 3 months.
- Thaw frozen cookies at room temperature for about an hour, or warm them slightly in a low oven (250°F) for 5-7 minutes for a freshly baked feel.
- You can also freeze the raw dough log, tightly wrapped in plastic and then foil, for up to 1 month. Slice and bake from frozen, adding a couple of minutes to the baking time.
Nutritional Benefits
While we primarily bake these zebra cookies for pure joy, I always appreciate that homemade treats give me control over the ingredients. Using good quality dark cocoa powder means you’re getting a small boost of antioxidants, which is a lovely bonus alongside the simple goodness of butter and flour. It’s comforting to know exactly what goes into every delicious bite.

FAQs
Can I make the dough ahead of time?
Absolutely! The dough for these delightful zebra cookies can be prepared up to two days in advance. Just wrap each portion tightly in plastic wrap and store it in the refrigerator. This rest actually helps deepen the flavors and makes the dough easier to handle when you’re ready to assemble.
Why are my stripes not as distinct?
To get those crisp, clear stripes, make sure both doughs are chilled to the same temperature before you roll and layer them. Also, avoid pressing too hard when you combine them, as this can cause the colors to muddy together. Gentle handling is key!
Can I use different flavorings?
Of course! While the classic chocolate and vanilla is beautiful, feel free to experiment. You could add a touch of almond extract to the vanilla dough, or even a hint of espresso powder to the chocolate dough to enhance its richness. Get creative!
How do I prevent the cookies from spreading too much?
Chilling the shaped dough log for at least 30 minutes, or even an hour, before slicing and baking is vital. Cold dough means the butter takes longer to melt in the oven, holding the cookie’s shape better and giving you a thicker, more defined cookie.

Zebra Cookies
Ingredients
Equipment
Method
Notes
2. Chilling the dough is essential. It helps the butter firm up, which prevents excessive spreading in the oven and helps maintain those distinct zebra stripes.
3. For even sharper stripes, try to handle the dough as little as possible once you've twisted the two colors together. A light dusting of flour on your hands can also help prevent the colors from blending too much while shaping.
Conclusion
There’s just something so deeply satisfying about creating something beautiful and delicious from scratch. These zebra cookies have brought so much smiles and wonder to my kitchen, and I know they’ll do the same for yours. Don’t be shy, give them a try! It’s all about the joy of baking and sharing, much like the cherished simplicity of my forgotten cookies.